
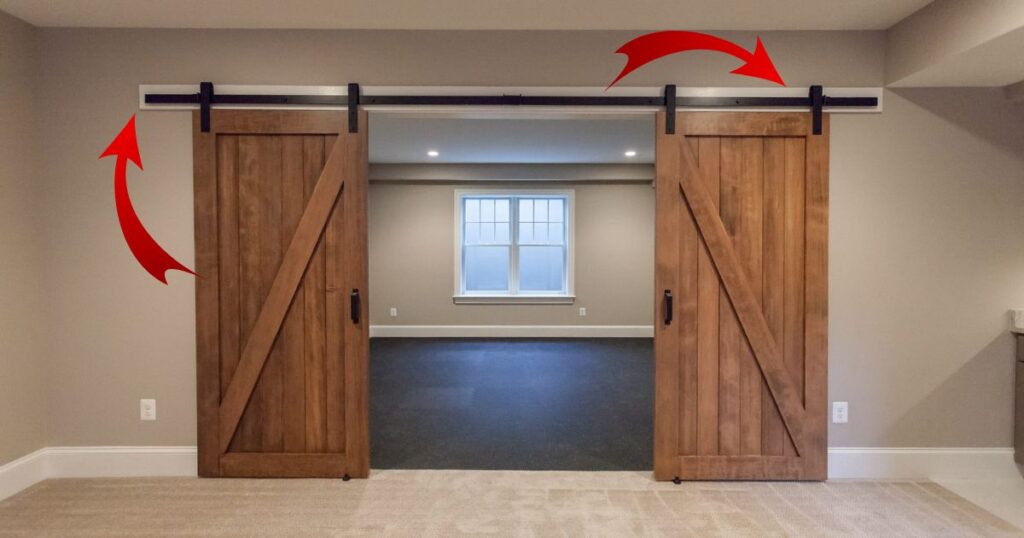
To build DIY double sliding barn doors, measure the doorway’s width and height. Then, cut wooden boards to fit these dimensions. Next, attach hardware for sliding and hang the doors on a track.
Transform your space with the rustic charm of sliding barn doors. These timeless pieces add a touch of warmth to any room. Discover the joy of crafting your own sliding barn doors. Learn how to build DIY double sliding barn doors and elevate your home decor.
First, gather materials like wooden boards and sliding door hardware. Next, measure the doorway’s width and height accurately. Then, cut the boards to fit the measurements and assemble them into double doors. Finally, install the sliding door hardware and hang the doors on a track for smooth operation.
Tools & Materials Used
Tools: You’ll need basic tools like a saw, drill, screwdriver, and measuring tape. These tools help you cut and assemble the wooden boards accurately. Additionally, a level ensures your doors hang straight and true.
Materials: Gather wooden boards, screws, and sliding door hardware. Choose sturdy wood like pine or cedar for durability. The hardware includes tracks, rollers, and handles for smooth sliding functionality.
DIY Barn Door Plans
Planning: Start by measuring your doorway to determine the size of the barn doors needed. Sketch out a design that fits your style and space. Consider factors like the type of wood and hardware required for your project.
Materials: Gather the necessary materials such as wooden boards, screws, and door hardware. Opt for high-quality wood that suits your aesthetic preferences and budget. Ensure you have all the tools and supplies before starting your DIY project.
Measure Door Space
Accuracy is key when measuring door space. Use a tape measure to determine the width and height of the doorway. Double-check your measurements to ensure they are precise.
Consider any obstacles or obstructions that might affect door installation. Take note of the space required for the door to slide smoothly. Accurate measurements lay the foundation for a successful door installation.
Height and Width
Height and width describe how tall and wide something is. Height is the measurement from the top to the bottom, while width is from side to side. Understanding these dimensions helps in choosing and fitting objects into spaces.
| Object | Height | Width |
| Door | 6 feet | 3 feet |
| Table | 2 feet | 4 feet |
| Chair | 3 feet | 2 feet |
| Window | 4 feet | 5 feet |
| Bookshelf | 5 feet | 3 feet |
Cutting Wood to Size:
First, measure the wood using a tape measure to ensure accuracy. Mark the measurements using a pencil or marker. Then, carefully cut along the marked lines using a saw.
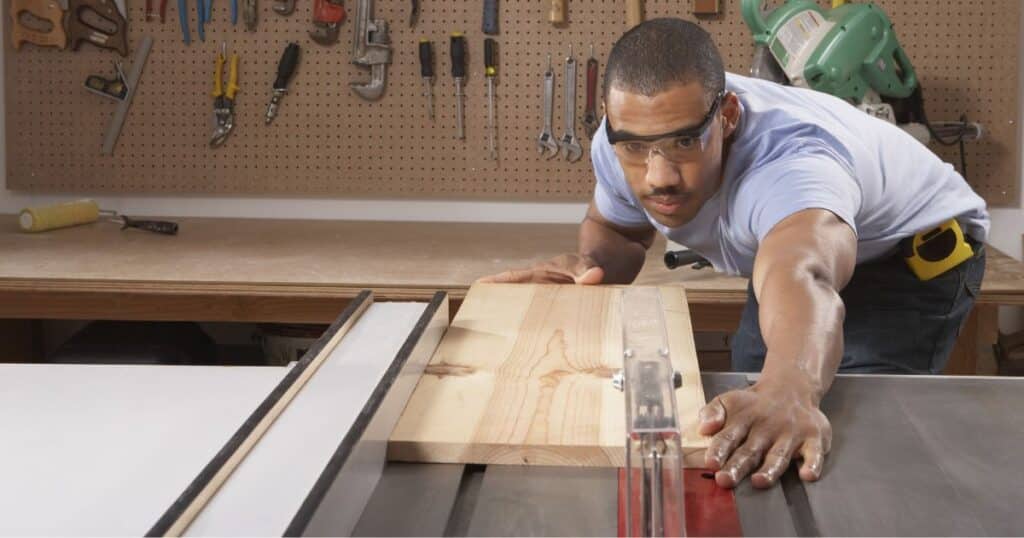
Remember to wear safety goggles and gloves to protect yourself during cutting. Take your time to ensure smooth and precise cuts. Always double-check measurements before cutting to avoid errors and wastage of wood.
Mark Joinery Locations
Start by determining where the joints will be located on your wood pieces. Use a pencil or marker to make clear marks at these points. Double-check your measurements and markings for accuracy.
Ensure that your markings are visible and aligned correctly for precise assembly. Take your time to mark the joinery locations accurately to ensure a strong and secure construction. Double-checking your marks helps prevent errors during the joining process.
Cut mortise
To cut mortise means to carve or chisel out a rectangular or square hole in wood, typically to receive a tendon for joinery. This process is essential in traditional woodworking for creating strong and stable connections between wooden pieces.
Apply Glue and Dominos
Begin by applying wood glue to the surfaces that will be joined together. Ensure the glue is spread evenly for a strong bond. Next, insert the dominos into the pre-cut mortises, aligning them carefully.
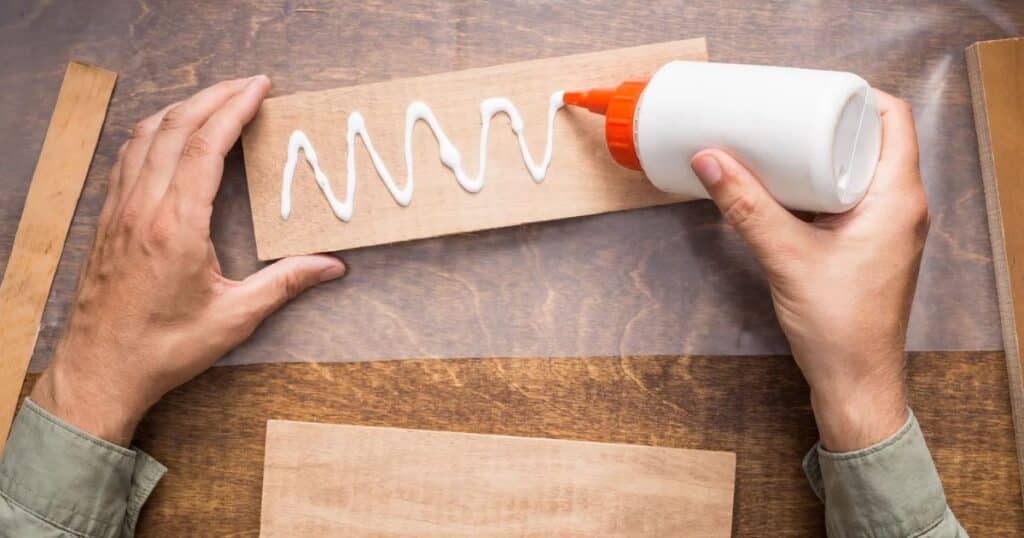
The dominos act as reinforcement, adding strength to the joint when combined with the glue. Make sure the dominos fit snugly into the mortises to maximize their effectiveness. Once the dominos are inserted and the pieces are aligned, allow the glue to dry completely for a secure and durable connection.
Quick Tip: Edge Joining Panels
When edge joining panels create a wider surface, ensure the edges are straight and smooth. Apply wood glue evenly along the joining edges. Use clamps to hold the panels firmly together while the glue dries, ensuring a tight and seamless bond.
Glue Up
First, apply wood glue evenly to the surfaces that will be joined together. Spread the glue with a brush or spreader to ensure full coverage. Then, press the pieces firmly together to create a strong bond.
Use clamps to hold the pieces in place while the glue dries. Make sure the clamps are evenly distributed for uniform pressure. Allow the glue to set completely according to the manufacturer’s instructions before removing the clamps.
Sand Wood
Start by selecting the appropriate grit sandpaper for your project. Coarse grits are used for initial sanding to remove rough surfaces, while finer grits smooth the wood’s surface. Hold the sandpaper firmly and sand with the wood’s grain for the best results.
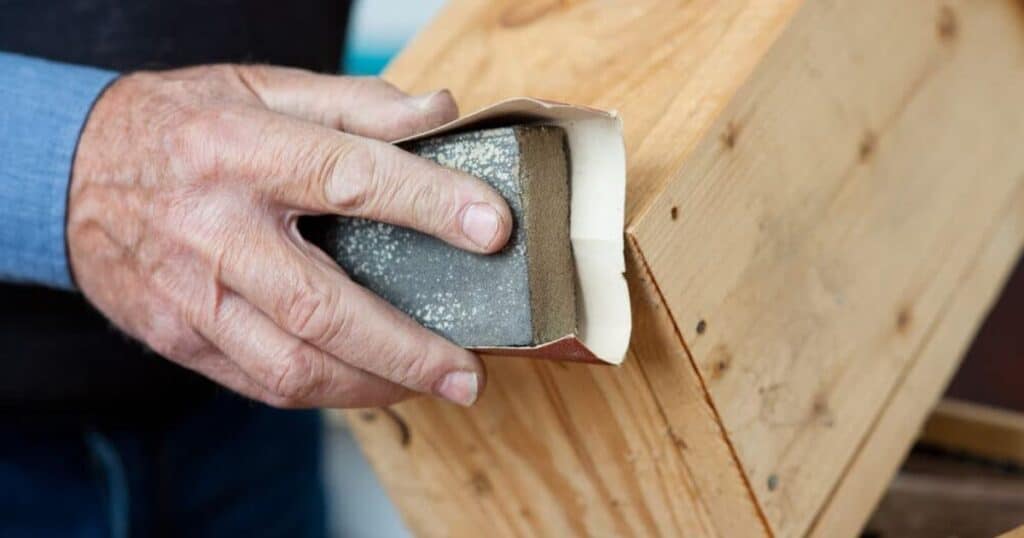
Work systematically, moving the sandpaper in smooth, even strokes. Pay attention to detail ensuring all surfaces are sanded evenly. Once satisfied with the smoothness, wipe away any dust with a clean cloth before proceeding with staining or finishing.
Outer Stile and Rail
The outer stile and rail are essential components of the barn door frame. Stiles are vertical pieces while rails are horizontal, forming the outer frame of the door. These elements provide structure and support to the door assembly.
Measure and cut the outer stile and rail pieces according to your door’s dimensions. Ensure they fit together snugly for a sturdy frame. Incorporate them into your DIY double sliding barn door project seamlessly for a polished finish.
Rubio Monocoat Finish Application
Begin by preparing the wood surface by sanding it smooth and removing any dust. Apply the Rubio Monocoat finish evenly using a brush or cloth, ensuring full coverage. Allow the finish to penetrate the wood for a few minutes.

After the designated time, wipe off any excess finish with a clean cloth. Ensure thorough removal to prevent uneven drying or buildup. Let the finish dry completely according to the manufacturer’s instructions for a durable and beautiful result.
Barn Door Hardware Installation
Start by determining the placement of the barn door hardware on the door and the wall. Use a level to ensure the tracks are installed straight and level. Secure the tracks to the wall using screws, making sure they are firmly attached.
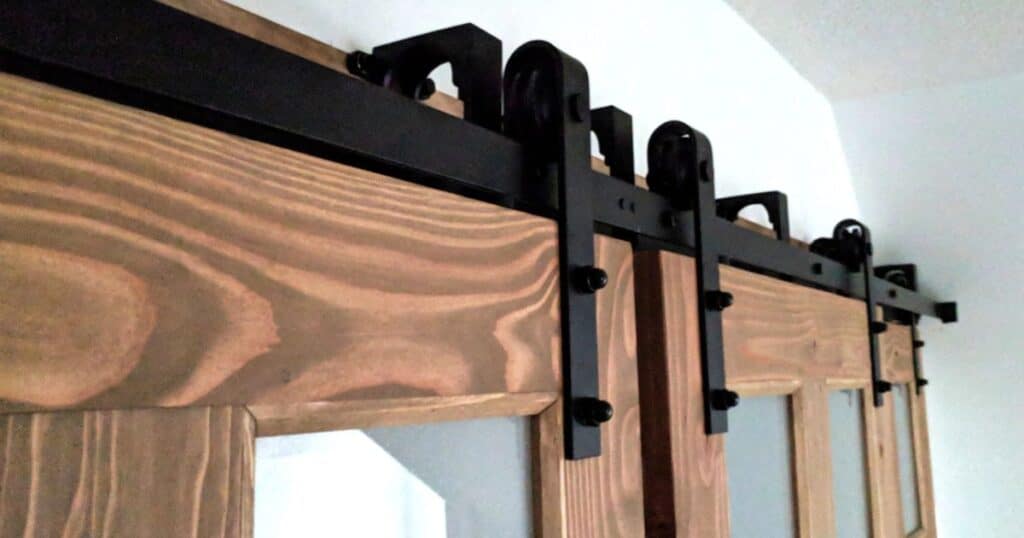
Next, attach the rollers to the top of the door according to the manufacturer’s instructions. Hang the door on the tracks and test its movement to ensure smooth sliding. Adjust the hardware as needed to achieve proper alignment and functionality.
Also Read This Blog: Wooden Sliding Door A Comprehensive Guide
Sliding Barn Door Hardware Kit
A sliding barn door hardware kit contains all the necessary components to install a barn door. It typically includes tracks, rollers, brackets, and screws. These kits come in various styles and finishes to match different decor preferences.
Begin by unpacking the hardware kit and familiarizing yourself with the components. Follow the included instructions carefully to assemble and install the hardware correctly. Ensure proper alignment and secure attachment for smooth and efficient operation of the sliding barn door.
Barn Door Magnets & Bumpers
Barn door magnets and bumpers are essential accessories for ensuring the smooth and quiet operation of sliding barn doors. Magnets are used to hold the door in place when closed, preventing it from swinging open unexpectedly. Bumpers are placed on the track to cushion the door’s impact when it reaches the fully open or closed position.
Install magnets on the door and corresponding metal plates on the door frame to create a secure closure. Place bumpers strategically along the track to minimize noise and prevent damage to the door and wall. Properly installed magnets and bumpers enhance the functionality and longevity of sliding barn doors.
DIY Barn Door Floor Guide
A DIY barn door floor guide helps keep sliding barn doors aligned and stable during movement. It prevents the door from swinging or swaying excessively, ensuring smooth operation. This guide typically consists of a small bracket or track installed on the floor.
To install a DIY barn door floor guide, first, choose a suitable location along the bottom edge of the door’s path. Secure the floor guide firmly to the floor using screws or adhesive, ensuring it doesn’t obstruct the door’s movement. Test the door to ensure it slides smoothly and remains properly aligned with the floor guide in place.
Conclusion
Building DIY double sliding barn doors is an achievable project with careful planning and execution. By following step-by-step instructions and utilizing appropriate tools and materials, anyone can create stylish and functional barn doors to enhance their space. From measuring and cutting wood to installing hardware and applying finishes, each step contributes to the overall success of the project.
With dedication and attention to detail, anyone can master the art of crafting their own double sliding barn doors. How to Build DIY Double Sliding Barn Doors offers a rewarding experience that adds both charm and functionality to any home or space.
Frequently asked questions
What tools do I need to build DIY double sliding barn doors?
You’ll need basic tools like a saw, drill, screwdriver, and measuring tape.
How do I measure my doorway for the right door size?
Measure the width and height of your doorway accurately using a tape measure.
Can I use any type of wood for building barn doors?
Yes, you can use various types of wood, such as pine, cedar, or oak, depending on your preference and budget.
Do I need special hardware for sliding barn doors?
Yes, you’ll need sliding door hardware, including tracks, rollers, and handles, for smooth operation.
How long does it typically take to complete the project?
The time to complete the project varies depending on your skill level and the complexity of the design, but it usually takes a few days to a week.

Warner Clips is an expert writer with 4 years of experience crafting engaging content on Home topics. My expertise ranges from creating cozy environments to tackling Home Improvement projects. Find my work in publications like Huffington Post and Reader’s Digest.